Add Employees
Navigation:
Enterprise Definition >> Internal >> Employees
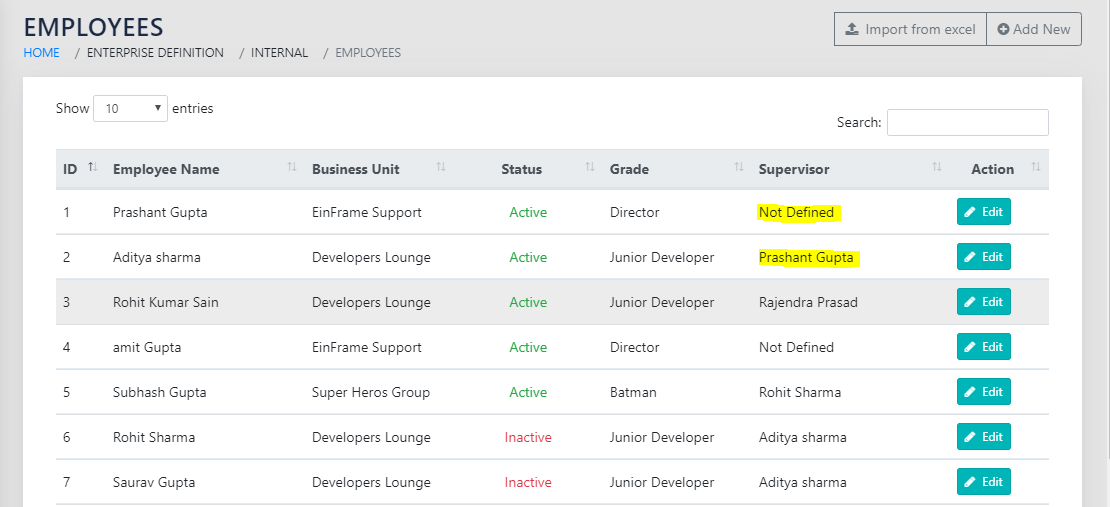
Figure 17: List of Employees shows all the employees in the system, along with their Status (Active/Inactive), Grade, Supervisor, Business unit and an option to edit the record. Clicking the Edit icon (Icons and Symbols) brings up the Add employees page, but with the contents prepopulated with the relevant row.
On clicking the Enterprise Definition >> Internal >> Access Roles, the administrator can define the access rights for the user. This is explained in Access Details.
The application features robust access management wherein access to functionality is adjudged by the role of the user. The users are of 3 types based on their access in the application:
- Level 1 (Administrator): Unrestricted access to all features of the application. Administrator can also login as any other users also and perform tasks in their name.
- Level 2 (Business Unit Heads/Deputy Heads): Access to selected functions of administrator along-with rights to capture data for own Business Units.
- Level 3 (Standard User): Access to limited areas like updating ’Employee Objectives’, ‘Individual Development Plan etc.
Creating an employee automatically creates A USER LOGIN WITH ACCESS TO LEVEL 3 AS DESCRIBED above. If the employee is made Head/Deputy head of any Business Unit, their access will automatically go up to Level 2. Level 1 access can be granted to any user by existing administrators.
If you try to access a page where you do not have rights to view/edit, the page shown in Figure 21: ACCESS Denied Notification will appear.
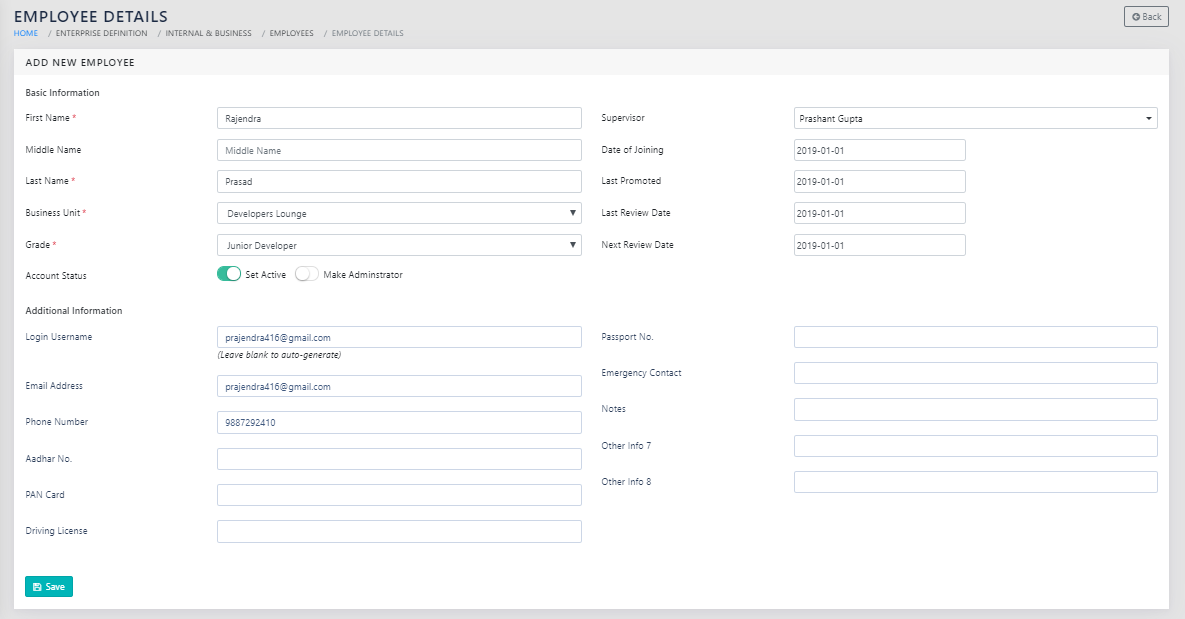
To add a new employee, click on “add employee”. The page shown in Figure 18: Add Employee appears. The Business Units and the Grades can be selected from the dropdown that is populated from the values from “Add Business Unit” and “Add Employee Grades” respectively.
You can also choose to make the employee an Administrator of the application by checking the option at the top of the screen.
The application gives the administrator an opportunity to login as someone else, by clicking Login As button on the page shown in Figure 18: Add Employee. This is useful for troubleshooting login issues and access control issues without password disclosure.
If the user has never logged in in the past, they land on the page shown in Figure 3: End User License Agreement Page, and they have to accept the EULA before proceeding further.
The Application also accepts importing the Employee Data from an Excel File directly. This is as shown in Figure 19: Import Employees from Excel.

The user must download the template for entering the employee data using the link in the “Instructions” as shown in Figure 19: Import Employees from Excel. This template, as shown in Figure 20: Employee Import Template, must be populated.
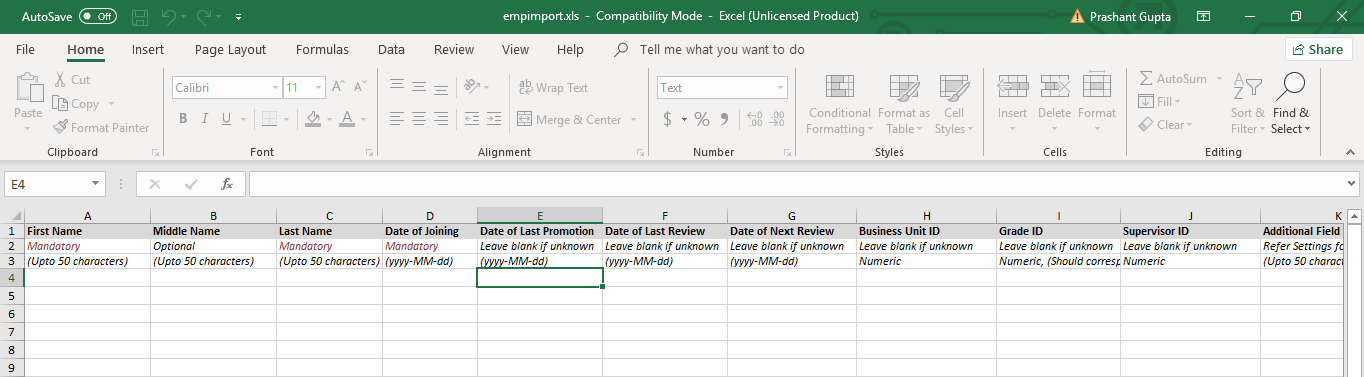
The user must then click on the Choose File button and provide the link to the filled file, and click on upload. This will import the employees in one go.